Hey let’s put our Fight Club pants on and learn something about making soap, shall we?
The runway: somewhere along the path of my Alinea cooking project, I became first curious then obsessed with the notion of minimizing waste and — even more compelling — utilizing trash. I think it may have been an article I read about Rene Redzepi finding interesting ways to utilize things like onions roots and offcuts in his kitchen — “trash cooking”, he called it. I find this idea so super-interesting that it’s turned me into a pseudo-urban homesteader. I keep offcuts and bones of chicken, lamb, beef and other meats in our freezer, forgoing room for frozen pizzas and ice cream in favor of building up supplies of scrap from which I can periodically make stocks or use in other interesting ways. Offcuts of vegetables get saved to make generic vegetable broth, which is useful for thinning foods I want to puree for my baby. It goes on, and I know I sound like an odd packrat.
But if you think all that sounds weird, hoo boy, strap in for this.
Sarah and I recently relocated to Chicago. While we were living in Oakland, we got on a jag where we wanted to learn to make soap. Our initial interest was only casual, but Sarah got a bit more into it, and since moving here we’ve tried to maintain our creative sanity when our daughter is napping by having soapmaking dates. The process is quick, quiet, and the hard part can be completed in less than 20 minutes.
The basic idea of soapmaking, if it’s new to you: if you mix some amount of fat(s) with some amount of a very alkaline ingredient (typically lye), the mixture undergoes a process called saponification whereby the fatty materials are turned to soap. Fats can include both plant and animal matter; soap can be made of olive, canola, coconut, palm, and myriad other oils, but can also be made from lard, beef tallow or even butter. And, of course, you can mix any of these in endless combination to dial in final aspects of your soap like bar hardness, lather quality, moisturizing properties, etc.
Our typical soap dates have so far consisted of relatively tame ingredients: shea butter, coconut oil, olive oil, etc. But one evening, as I was discarding the dregs of some oil I’d used to cook some fish, I had a light-bulb moment.
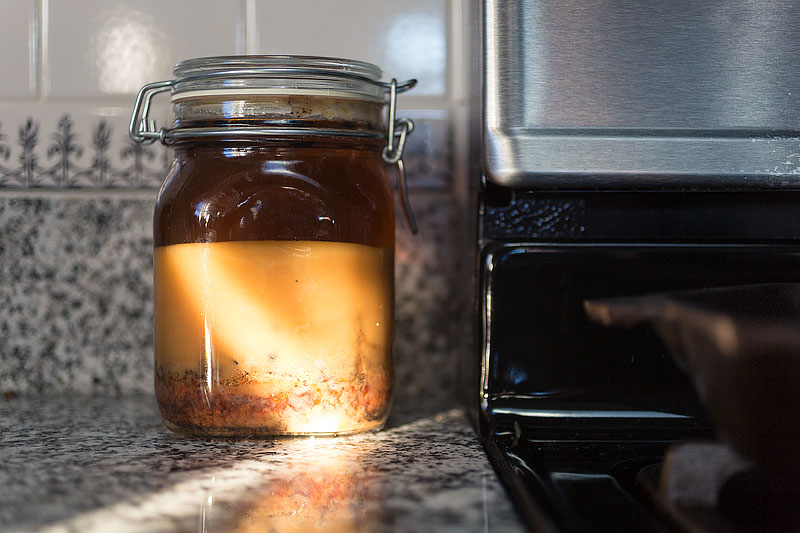
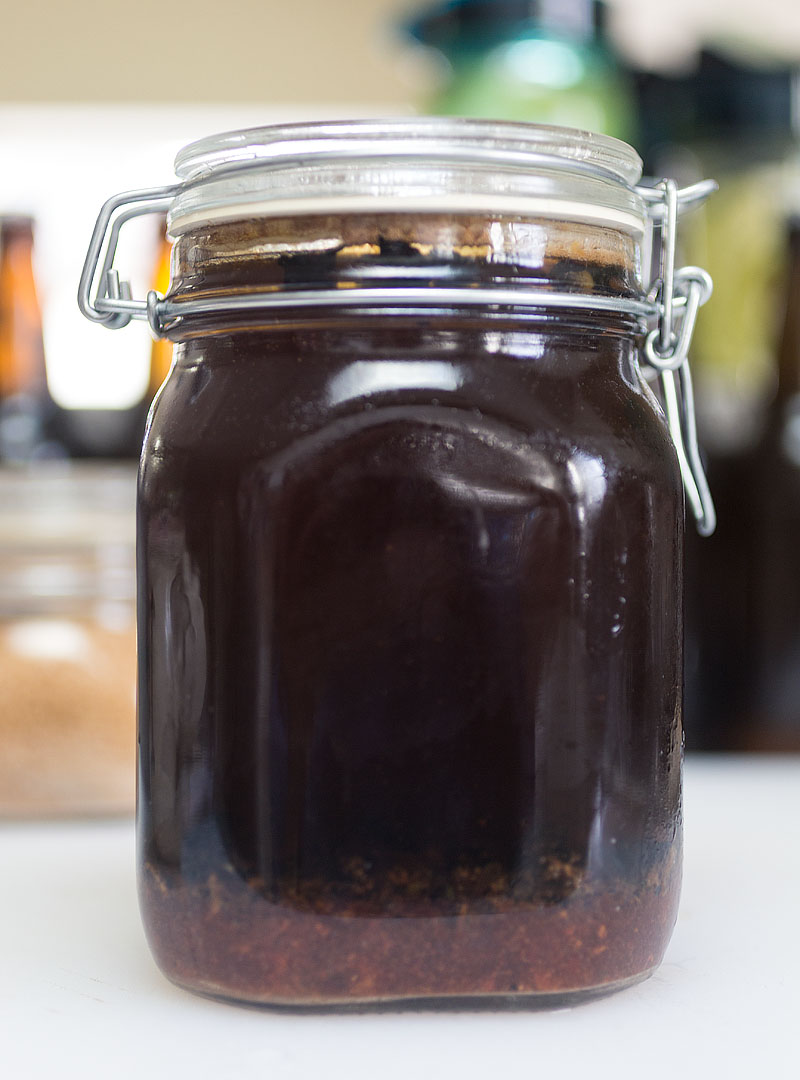
For the past three months or so, I’ve saved any and all fat waste generated in our kitchen: bacon grease, excess cooking oil and butter, animal fat…you name it. I poured/scraped/dumped all of it into a jar I’ve kept near our stovetop, until finally the jar was full.
Then I turned this mess into soap.
When crafting soap, it’s helpful to understand that different fats have different saponification (or SAP) values. That is, it takes a different amount of alkaline substance (lye) to convert a given fat to soap. Plant fats/oils seem to generally require less lye to be converted to soap than animal fats. There are all manner of lye calculators to be found online to help one hone in on exactly how much lye to use by weight for a given distribution of input fats. This is all well and good…if you know what your constituent fats are (and how much you have of them). But I had zero way of knowing the exact makeup of my jar of trash oil, so I had to take a guess.
The potential consequences of bad guessing: if I underestimate the lye, the fats wouldn’t completely saponify, and I would be left with a bar of something sort-of soaplike but also sort of trash-fatty, which might not be the best to shower with. If I overestimate lye content, the resulting soap would be excessively alkaline, with the potential (in an extreme case) to cause chemical burns when I rubbed in on my delicate man skin.
But what the hell. Science, amirite?
I used a soap calculator to calculate required lye values for each of the various oils I thought I had in my jar (canola, olive, beef fat, lard), but I knew that I had all sorts of other stuff in there (butter, fish fat, who knows what else). I found there to be less variance than I expected in required lye amounts, so I decided to just try the dumbest possible approach: guessing at a rough average makeup of my jar, and basing the lye calculation off that.
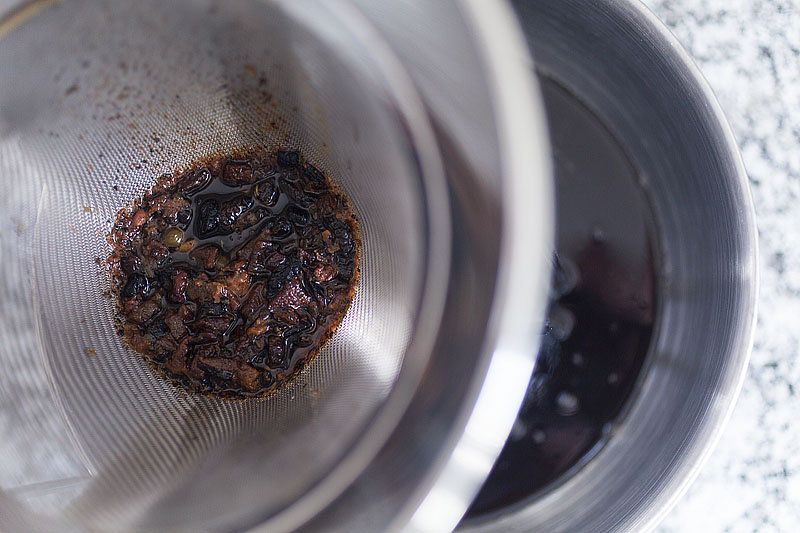
I needed a starting weight for my fats, and also knew I’d need to filter out as many greebly bits as possible. I warmed the jar in a water bath until everything was liquid, then strained the contents through an chinois and then a superfine-mesh strainer to yield as ‘pure’ of a fatty base as I could.
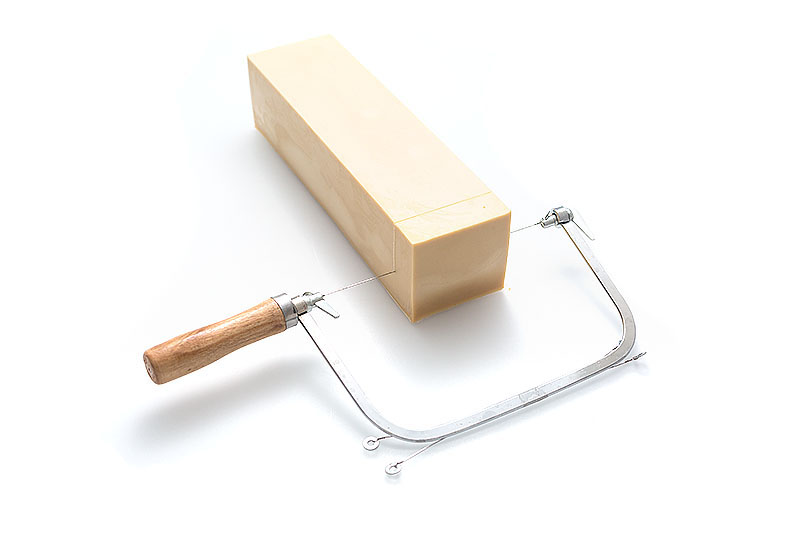
After this, I collected my equipment and ingredients. Sarah and I have a separate set of containers and mixers we use for soapmaking; we were much more cavalier in Oakland, but having a baby changes how you think about cleanliness.
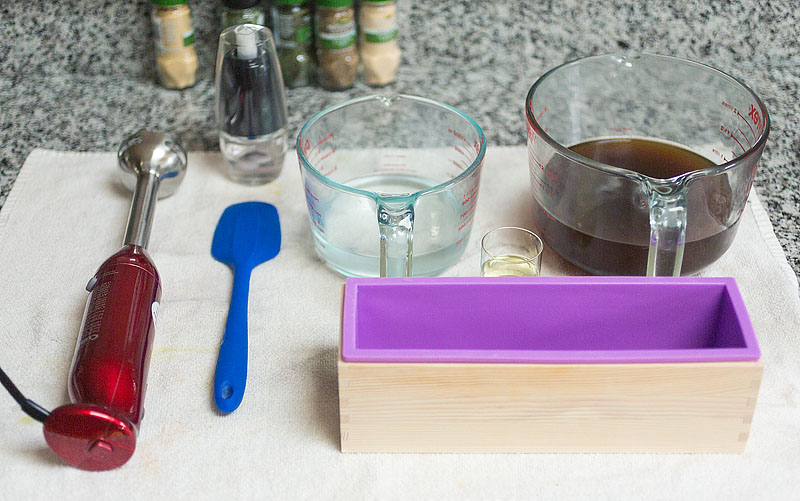
Here we can see my fat (on the right, still warm), a silicon soap mold, stick blender, and a lye-water mixture. When one adds lye to water (NEVER do this the other way around; pouring water into lye can cause a superheated reaction that can break your container), the mixture heats up. While the temperature at which one mixes the fat and lye solution can vary based on personal preference or intended soap recipe, a good ballpark is the 125-140F range. Usually this means you need to wait for the lye solution, which can reach near-boiling temperatures, to cool a bit. Then, the task is to gently add the lye to the fat, and mix with the stick blender until a stage called “thin trace” is achieved. At this point, the soap will look a bit like pancake batter, and drips will leave “thin traces” in the mixture as you drizzle it around. Continuing to mix will cause the batter to thicken considerably. Generally the consistency you aim for is based on what you need to do with the soap next (pour it into complex molds, make a pattern with it, etc).
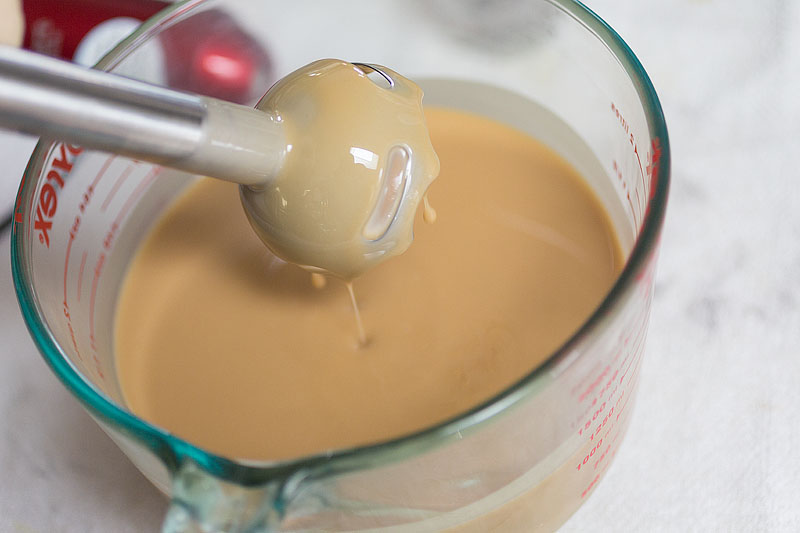
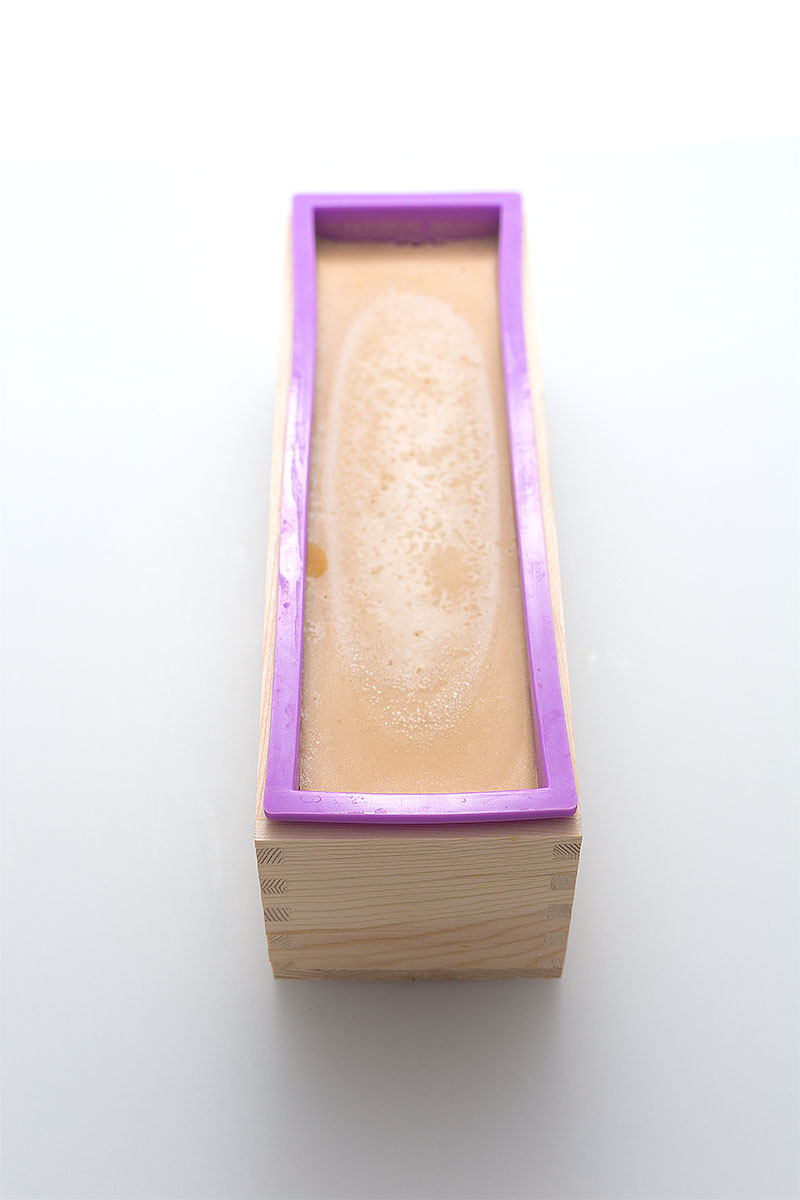
I wanted to minimize bubbles, so I stopped at thin trace and added my fragrance, which in this case takes the form of essential oils. I have a LOT to learn about perfumery, but thought I might try aiming for a nice woodsy, masculine scent for this bar, to compliment the brown color and flecked texture of the mixture. I chose a blend of lavender, cedar, pine, and black pepper…a real Ron Swanson-y kind of vibe. Once this was whisked in, I poured the mixture into my soap mold and tapped it a few times to cause the bubbles to rise to the surface.
I should mention that up to this point, I’d been feeling pretty proud of myself. Things seemed to be behaving as I expected, and I thought I was well on my way to some lovely soap. But after pouring the mixture into the mold, I took a nice deep sniff of it…and recoiled. It basically smelled like cedar, lavender, and gross fish and bacon and shit. My heart sank a bit…I hadn’t really anticipated the potential need to deodorize this stuff. But, I figured, this is a big experiment, so I forged on, stink and all.

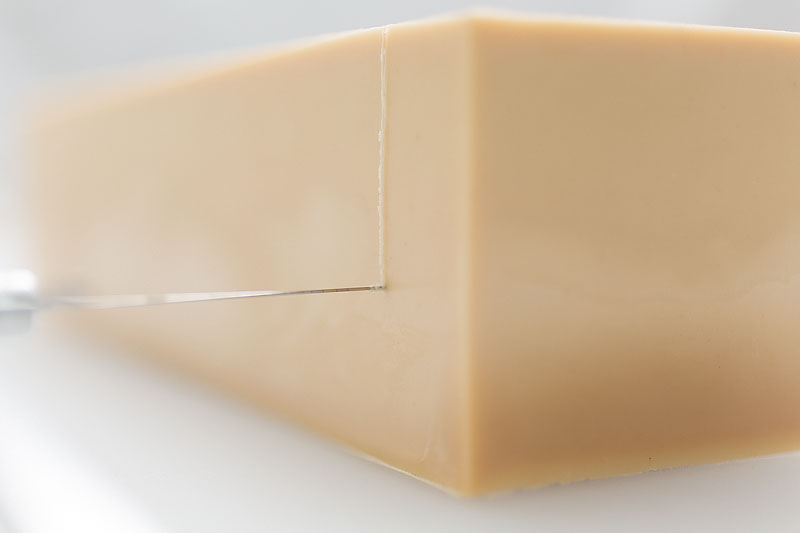
This mixture is left to sit for around 3 days to firm before it can be removed from the mold. During this time, a bit of white film can form on the soap (soda ash). The film is only aesthetic; it doesn’t indicate flaw or affect the performance of the soap.
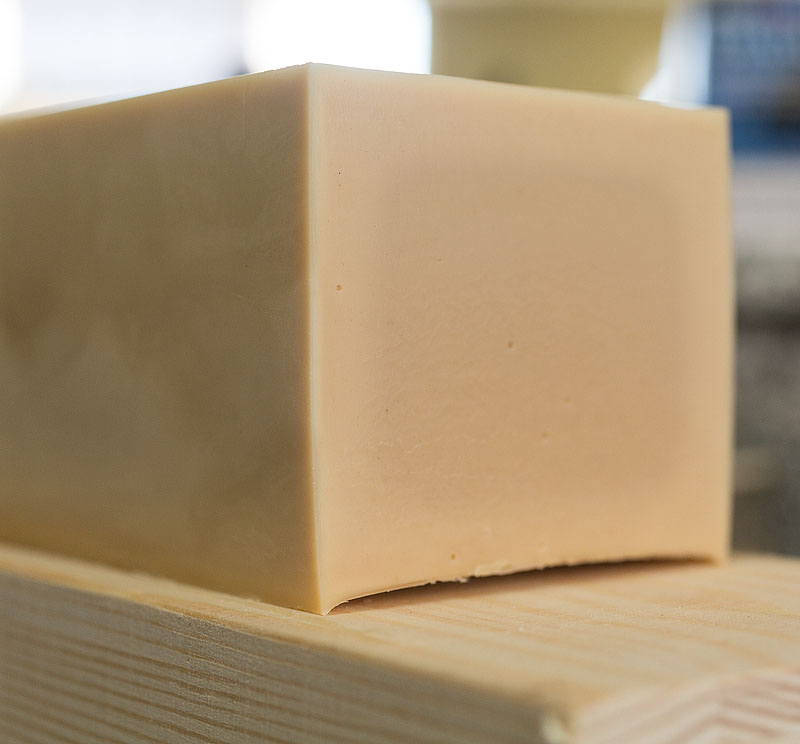
After 3 days or so, the mold can be flipped and the soap bar eased out. I noticed at this point (with no small degree of joy) that the crappy fishy/bacony/food-y smell I’d smelled with first making the bar had completely dissipated. The cedar/lavender scent was all I could smell, and while I can’t say it’s my best perfumery experiment, it definitely smells better than what I started with.
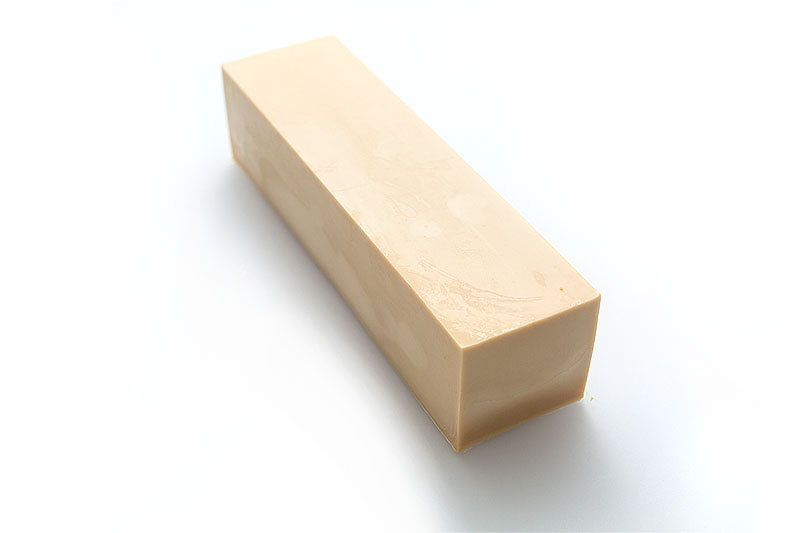
The soap can then be cut into bars. You can use a knife, but the soap tends to stick and then tear against the blade. We bought a cheap wire cutter which works well for this.
The rate of saponification is temporally-exponential. That is to say, the process happens quickly at first, but then slows down after the first few days. While the soap is firm enough to unmold and cut after this period, it will continue to saponify over the next several weeks. During this time, I keep the bars standing on a sheet tray on a shelf, where the circulating air allows for moisture to escape and will cause the bars to further harden. Fats that are solid at room temperature tend to impart more hardness to the final bar of soap than fats that are liquid at room temperature.
There’s also a notion of something called “superfatting”, which basically translates to deliberately shorting your lye content in order to leave some unconverted residual fat in the bar, which presents itself as skin moisturizer when the bar is used. To create a soap that leaves skin feeling silky and moist, one can use oils that naturally feel nice to touch (olive oil, shea butter, e.g.), and then short the lye content (or “superfat” the soap) to yield something that might be suitable for a facial bar or a gentle cleansing bar. On the other end of the spectrum, heavy reliance on animal or solid fats and a lack of superfatting yield a bar that is very hard and shiny. The harder bars tend to last longer in the shower, consequently. Bars that get goopy or develop a puddle of gel in the shower are either underaged or aggressively superfatted (or both).
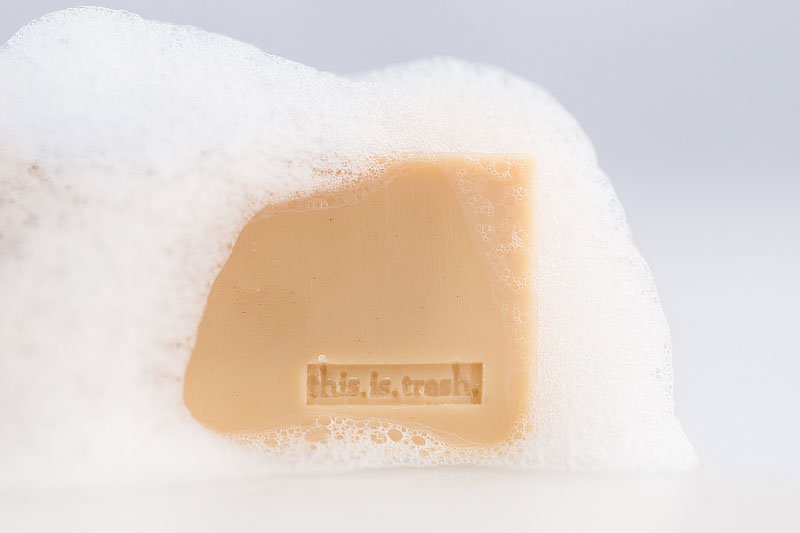
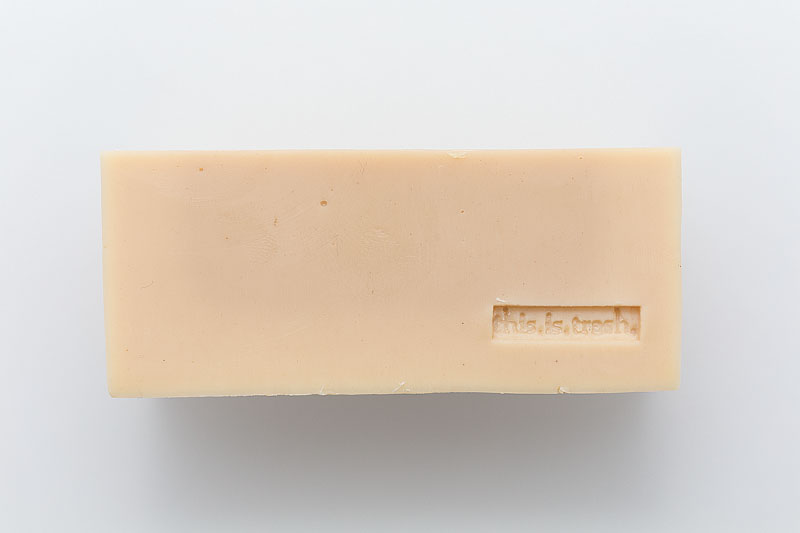
Anyway, you can see here the darker central core of my trash soap, indicating the outer bit has cured more fully than the interior. As time passes, the color will become homogenous (hopefully).
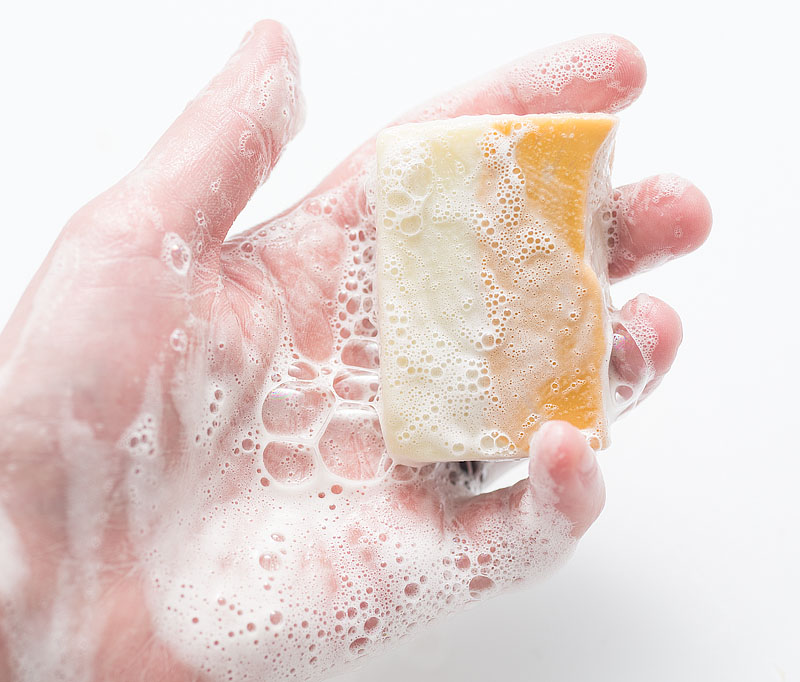
There is another use to aging the bars as well: freshly-made soap produces a weak, slippery lather that feels underdeveloped. Technically the bar can clean stuff, but it’s not particularly effective or satisfying.
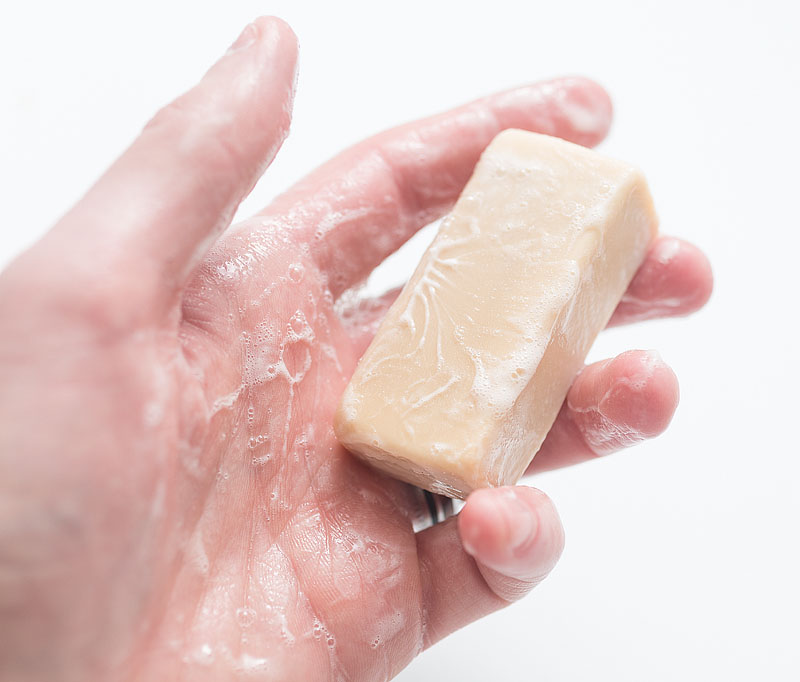
Compare this to the lather quality of a bar Sarah and I made about two months ago, which has been curing since:
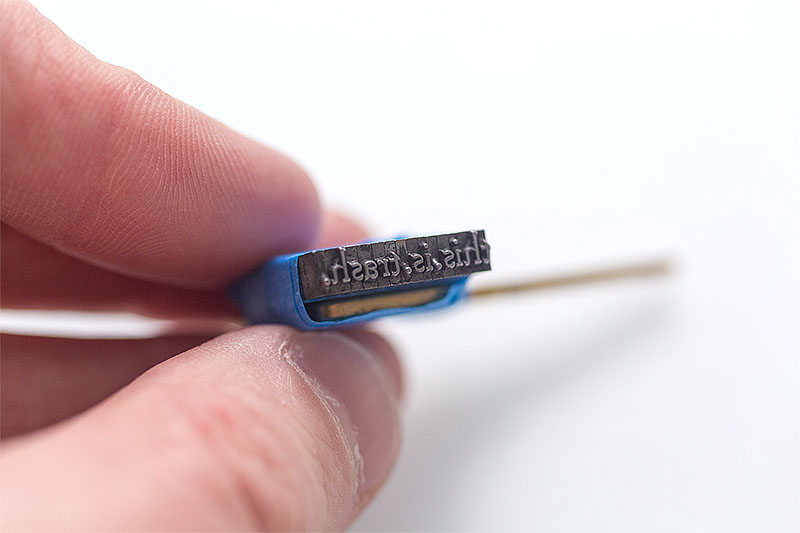
To brand the soap, I used some letterpress letters Sarah and I bought off ebay several years ago. I taped the letters together, then to a housekey to keep them aligned properly. To deboss the soap, I tapped the mounted letters gently with a mallet into each bar.

An early test run of the soap left my hands feeling neither overly-oily nor overly-dry or burned, so I *think* I got the lye within a reasonable range for this batch of oil. The lack of control here will mean that I can’t carefully-craft something that will be super-luxurious for facial use, but this bar will work fine for handwashing or cleaning pots and pans. I’m going to continue collecting kitchen oil and making soap from it; it’s a cheap way to learn and it feels pretty satisfying to have something constructive to show for the waste.
Two final codas:
–Most drain cleaners contain lye; the idea is that if left to sit on the grease and grime ostensibly covering the inside of your sink drain pipe, the lye will eventually cause the fats to saponify, effectively creating soap inside your drain pipes, to be handily washed away when you next pour water down the drain. This is why the instructions tell you not to rinse the drain cleaner with water after deploying it: the saponification process needs time to work.
–I thought I was being pretty clever with all this until I mentioned it to my mom one day. She casually responded that her grandmother (my great-grandmother) used to do this with leftover hog fat every weekend on her stovetop.